Your first layout - step by step
Your first layout - step by step
We will describe how to create and use your first layout without going into too much explanation at this stage, you can find more detail in the following articles.
1 : List of layouts
From the empty list of layouts click the 'New' button.

2 : First Layout Creation Screen
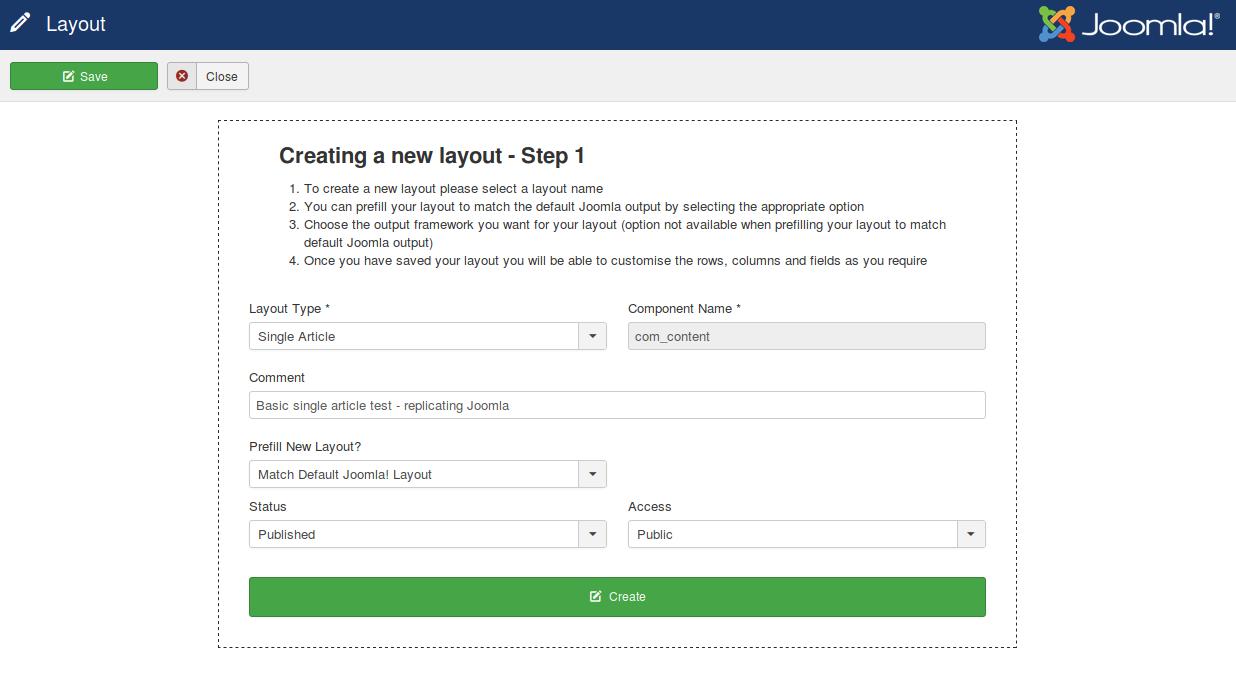
You then see the first layout creation screen where you can:
- select the layout type - in this case we have chosen the 'single article' layout which will affect pages displaying a single article in the frontend of your site,
- add a descriptive comment (used in backend list view only) - adding a simple comment to help us distinguish between similar layouts in the backend list,
- decide to base your new layout on a replica of the Joomla layout (recommended for beginners), this layout can then be easily modified later - in this case this is what we have decided to do,
- decide if your new layouts should be published and its access level (i.e. which users would be affected by this layout in the frontend).
We then press 'Create' or 'Save' to move on to the second stage of creating a layout

3 : Second Layout Creation Screen
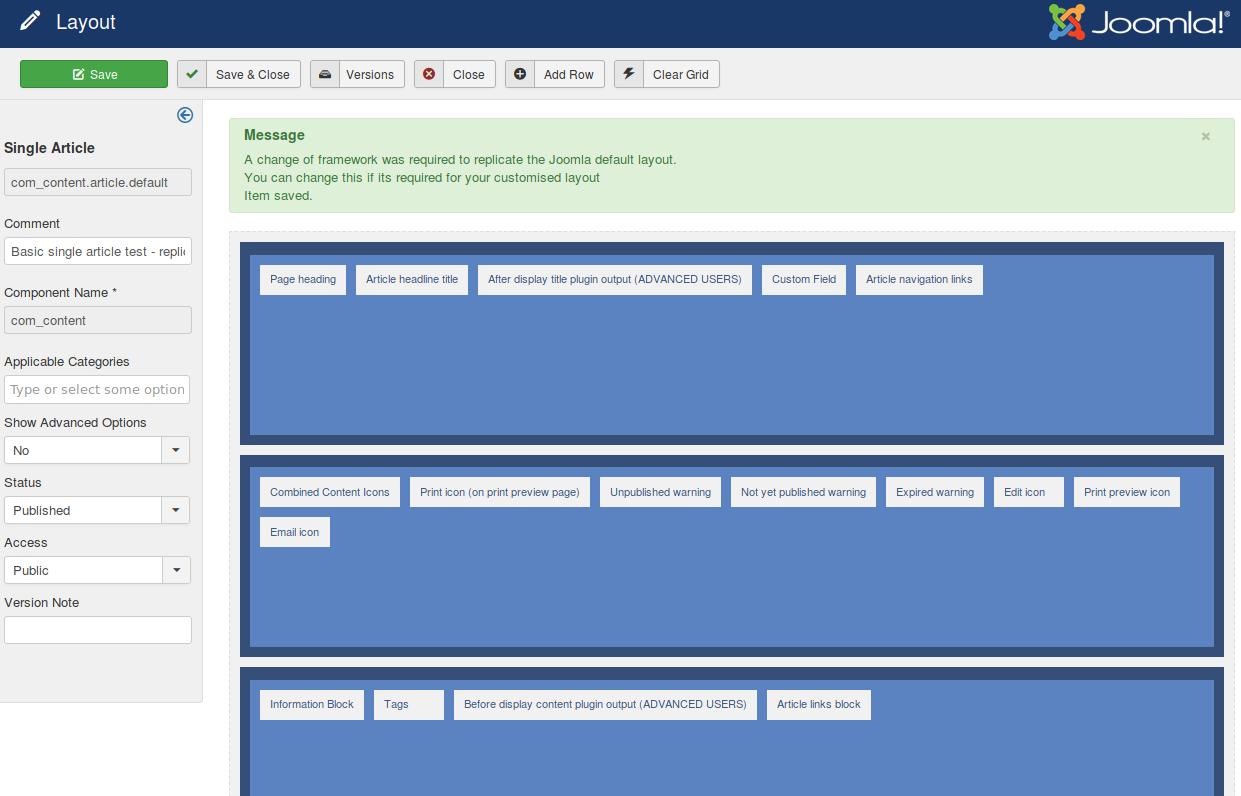
We now have our first layout populated with fields to match the core output of Joomla. For the time being you can ignore the message in green about 'A change of framework' - this relates to the output framework you may want to use in your layout (e.g. Bootstrap2, Bootstrap3, UIkit2 etc.) and will be explained in more detail later.
Your layout consists of a series of rows (dark blue), columns (pale blue) and fields (white). We will discuss how to modify these or add to/delete them in the next few articles.
Finally press 'Save & Close' to return to the list of Layouts.

4 : List of Layouts showing our new Layout
You now see your new Single Article layout (with its comment) in the list of layouts - published and ready to be used

If your site uses the Protostar template and you view and article in the frontend of the site you should now see very little difference in the way the article appears. So how do we know EasyLayouts it working?
5 : Showing that EasyLayouts is working
If we re-edit our layout we can move the "Article Title" field simply by dragging it and dropping it after the the tags field
Now if we save add some extra text in the layout to show that EasyLayouts is generating the layout of your article.
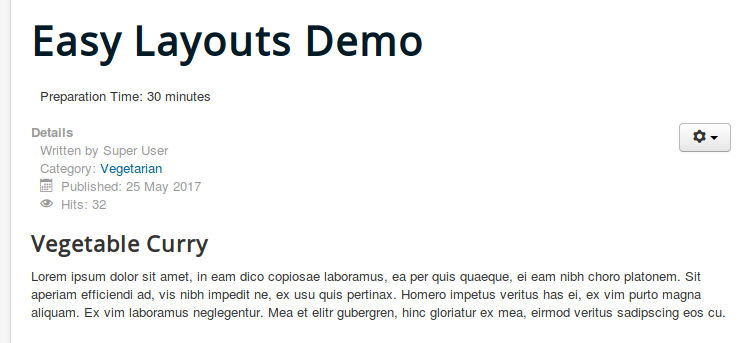
6 : Article Title has been moved
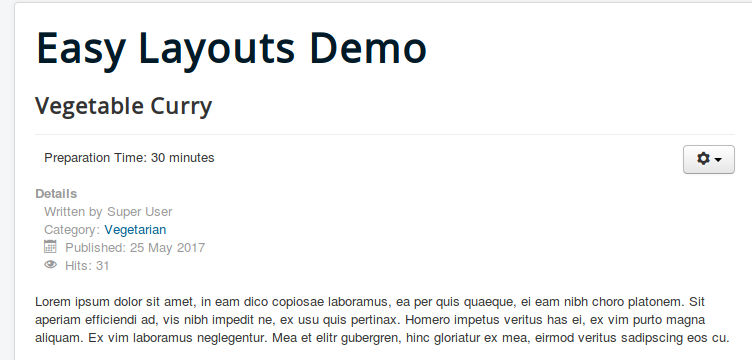
Compare the before and after screenshots that show how the layout was changed by moving the title
Before Moving Title

After Moving Title
